Drum triggers can be quite simple to make. But to make one that triggers well and is playable is another story, it requires some experimentation. There is a lot of info out there, dispersed in Edrum forums, Youtube and such but I will try to sort of sum it up here in an introduction to the different trigger mechanisms compatible with commercial drum modules.
We can't start this discussion without talking about the different brands of Edrum modules. Each has it's own twist on drum triggers. However, unless you are on the Yamaha family of Edrums, they are fairly similar and be made to work with DIY triggers. We will talk about the Yamaha side of things too, and why they are less attractive to the DYI drummer...
They come in multiple formats. The trend now is to make them the actual size of acoustic kits, like the VAD series in Roland. This desire for acoustic size drums is what drove me to make my own triggers, transforming acoustic kits into digital pads.
The heart of all those drum pads is the Piezo sensor. To those unfamiliar with them, they are simply two layers of metal that sandwitch a Piezo Electric Material. When pressure is applied to the sensor, an electrical signal is produced. It is akin to a microphone, however works in a different way. Piezos are also used in acoustic guitar pickups and any other instrument where you can pick-up the physical vibration with a Piezo.

This is what a Piezo looks like, that is basically what is in the drum pads generating the signal.
Now there are basically two distinct things we want to capture in a drum pad. The head piezo generates a signal when the head is striken. Another piezo is responsible for picking up the rim hit if so equiped. We call them zones, a single zone pad will have only one piezo under the head. A dual zone pad will have a piezo under the head and another coupled mechanically to the body of the drum to pick up hits on the rim. Useful for rim shot sounds or rim clicks on a snare... You can also divide the zones on toms for example and assign a cowbel sound to the rim while keeping a tom sound on the head... Most modern modules support dual zone pads.
There are many different types of pads on the market today. I won't delve in the vintage stuff, that might be the subject of another article if I can put my hands on a few oldies... but the current stuff can be divided in two main categories:
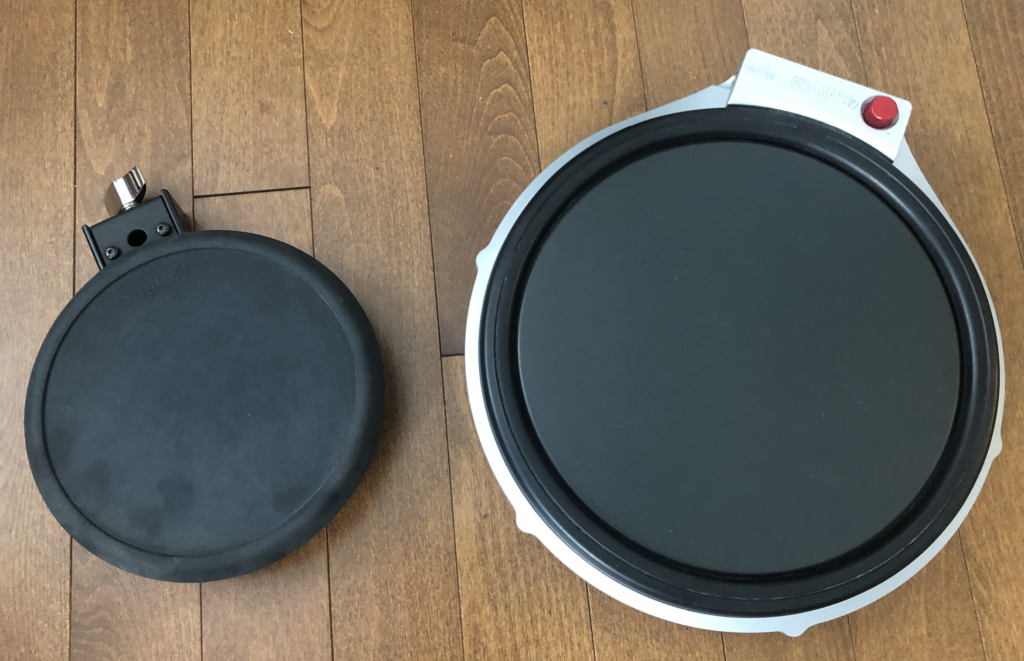
The Rubber Pads
Those are still available mostly on lower end kits, they have been mostly replaced by mesh head pads. However, they are still quite functional and some even like the Yamaha Silicone Pads more than mesh. But the principle is pretty much the same functionally. The idea is that a mechanically coupled Piezo captures the vibration created when we hit either the head or the rims. The Yamaha pad on the right is an exception though and we will talk about it later as its rim is actually made up of switches which makes it incompatible with anything but a Yamaha module.
Dissecting one of those pads reveals the actual simplicity of the pick-up system. Let's look into one of them:
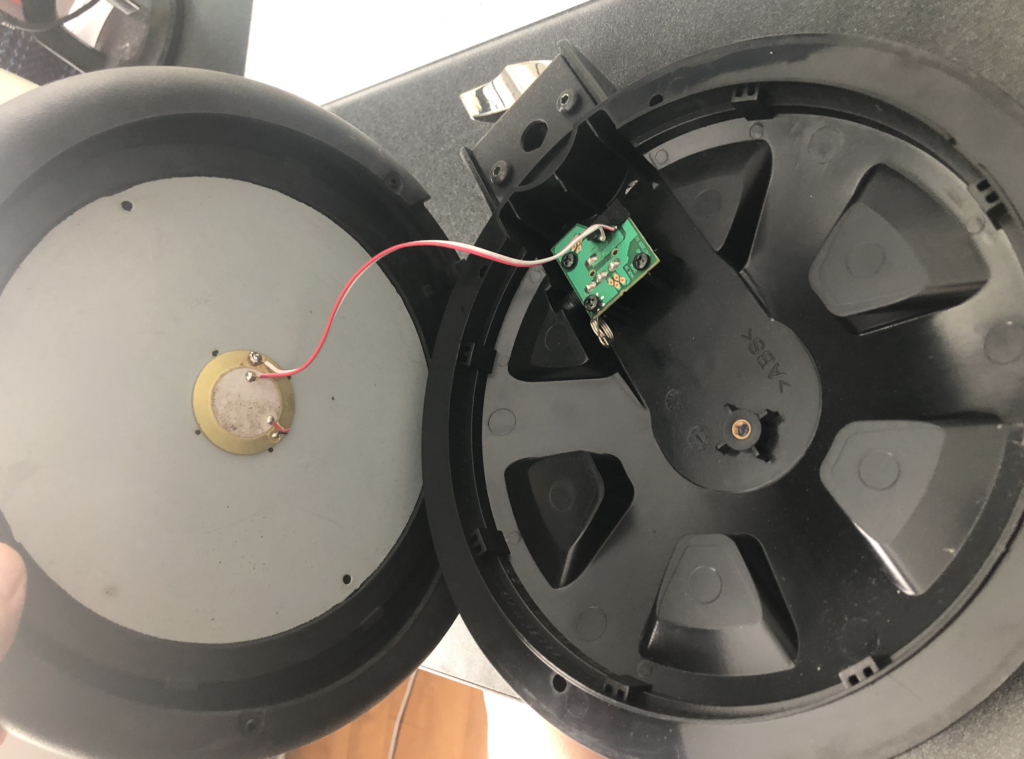
Yes, they are that simple.
Taking off the rubber part, we see that it is basically a metal plate (I see particle board used here too) with a rubber or silicone top with a piezo attached to it. When you strike the plate through the rubber, the plate is suspended in the rubber slieve and the vibration is picked up by the Piezo. This vibration generates the electrical signal used by the module. Now the circuit board has no active electronics on it, it is just a connection point for the piezo to the 1/4 in jack, you could omit it completely and wire the piezo directly to the jack.
Given the simplicity, you can easily extrapolate that you could mount a piezo on just about anything and use it as a pad as long as the vibration made by hitting the <thing> you mounted the piezo on can capture the hit. There are many attachments that work this way, tubes, fake cowbells etc. Your imagination is basically the limit here. You must however understand how piezos work, you don't just glue them to the surface... more on this in our Understanding Piezos article.

The Mesh Pads
Every manufacturer makes mesh pads now. It helps that Roland's patent (don't get me started with patents...) expired in the US for selling drums with Mesh Heads. Even cheap drums such as Dormer now makes mesh heads on their entry level drums. These are basically similar electrically to the rubber ones, one piezo for the head, one for the rim when they are dual zone (most are). Now here, there are a few variations on the sensor placements. The PDX-100 on top left here has a centrally mounted piezo, the PDX-12 on the bottom right has a side mounted piezo... Those give us different characteristics of playability... But more on that later...
Dissecting a mesh pad, we see the coupling system between the head and the head piezo is a little different. It needs a connection to the vibrating mesh head (or Mylar head works too). However, that connection can not be tightly coupled as the head must still be free to move. To do this, they use simple foam blocks between the head and the piezo. Foam blocks come in many different flavors, mostly cones and columns. You will usually find the cones in the center of the head while towers are mostly used for side mounted triggers, but there is no hard rule here, both work anywhere. You find some after market triggers with columns that mount to the center of the head, but there are a few disadvantages to this, notably hot spotting. Naturally, you will always get a hot spot (a spot on the head that if you hit even softly will be wildly louder than the rest). That is because if you hit the foam directly, there is more energy transferred to the piezo... Let's look at the insides of a mesh head pad:
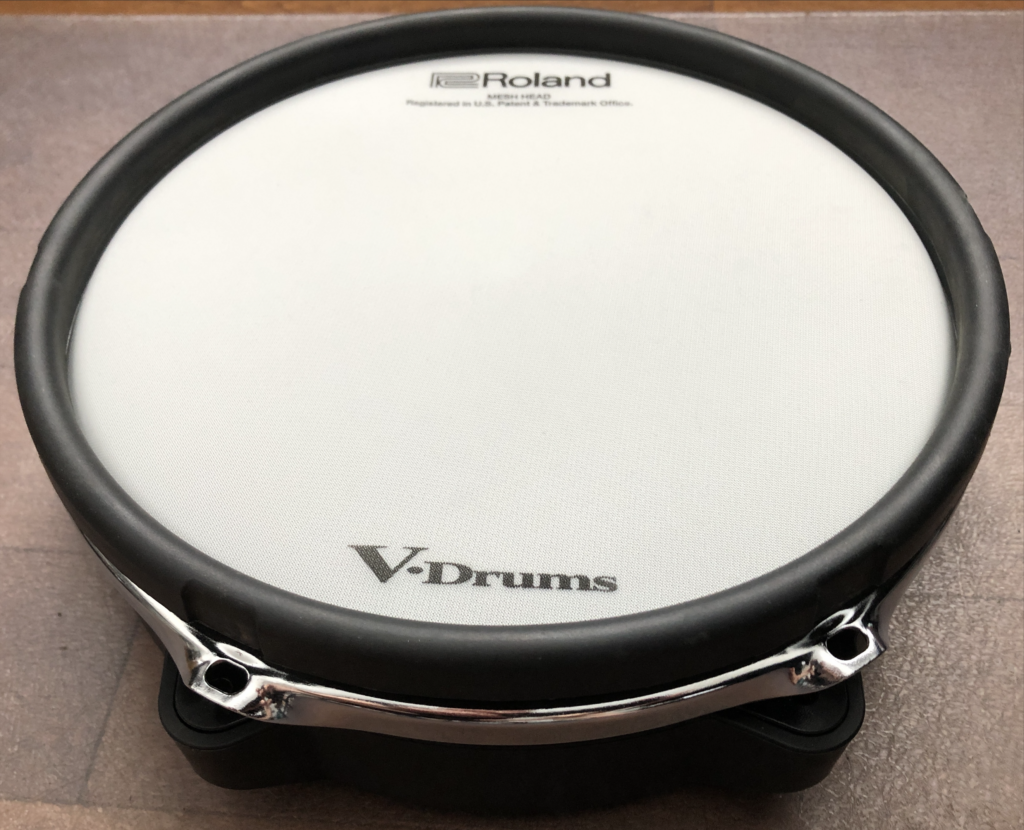
Anatomy of a center cone pad
They are basically all built the same way, with some companies using different techniques for mounting, but the principle is the same.

The cone
Very simple construction, as you can see, there is very little magic. The cone sits at the center of the mesh head, the top of the cone contacts the mesh head slightly, thus transmitting the vibrations of the head to the piezo element that sits under it. The cone only touches the head at the smallest point, minimizing hot spotting.
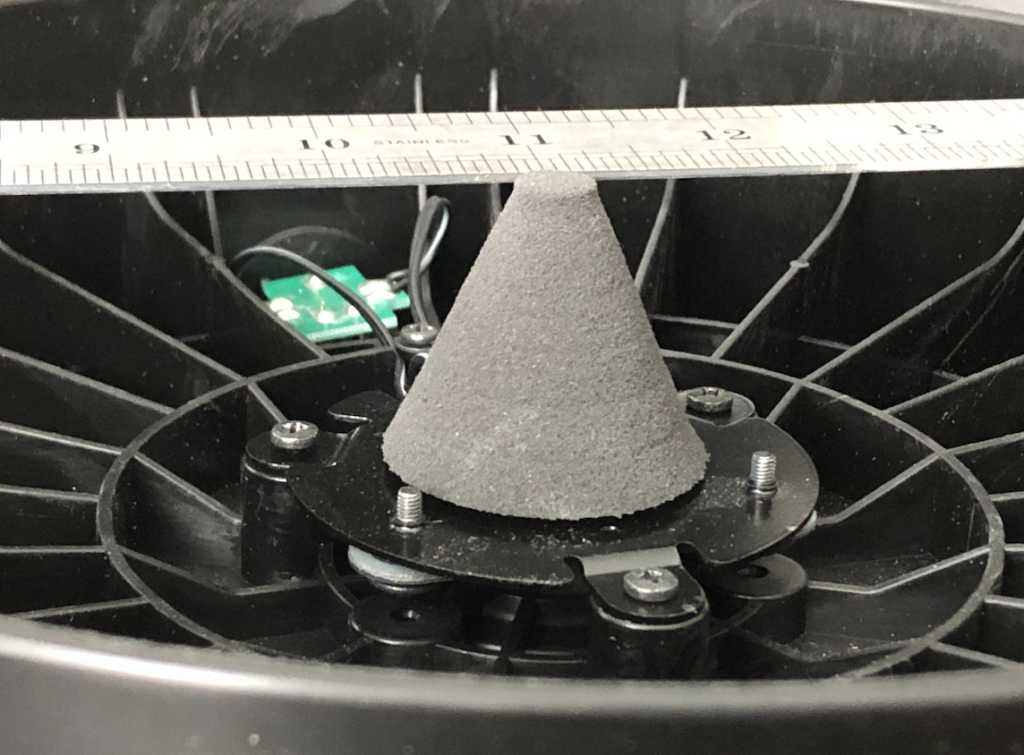
The cone produdes above the edge slightly.
In order to contact the mesh head, the cone produdes slightly above the rim edge, so the mesh head squishes the cone lightly but keeping constant contact with the head. The pressure must be enough to not loose contact with the head at any time.
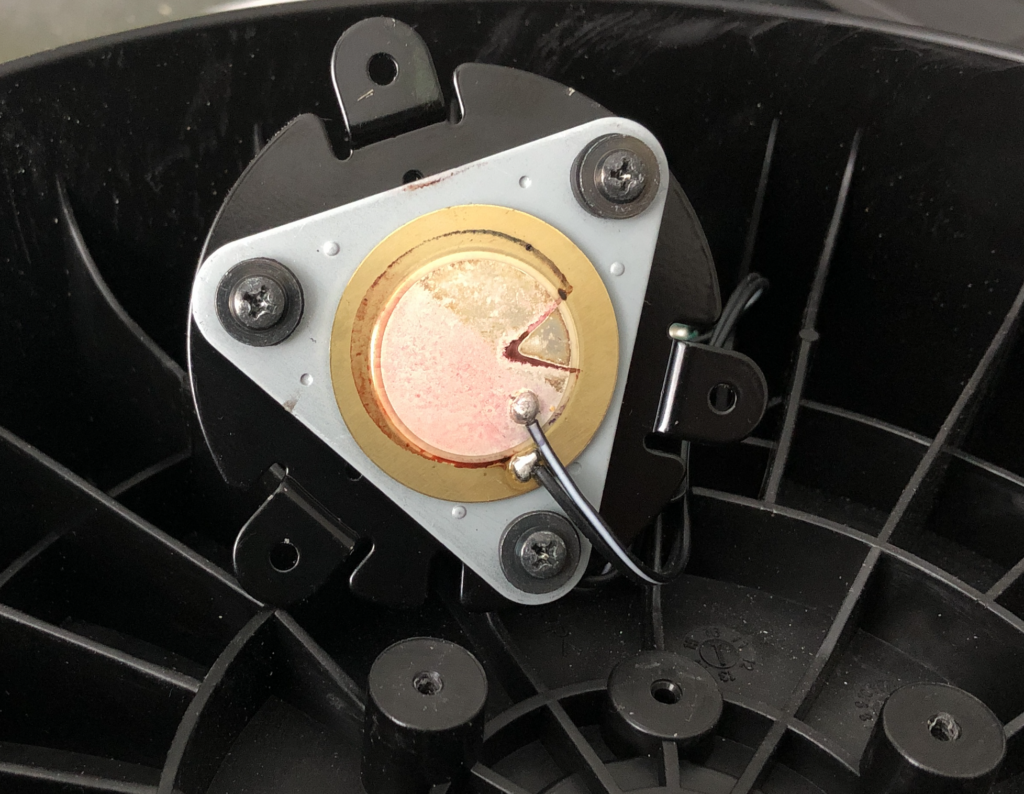
The rim piezo
This is the second piezo that captures the second zone, that is the rim hits. As you can see, it is mounted in such a way that it has space to move (vibrate) when the rim is hit. The center cone is mounted rigidly to the frame. Yes, those things are that simple. And they mostly follow the same construction method.
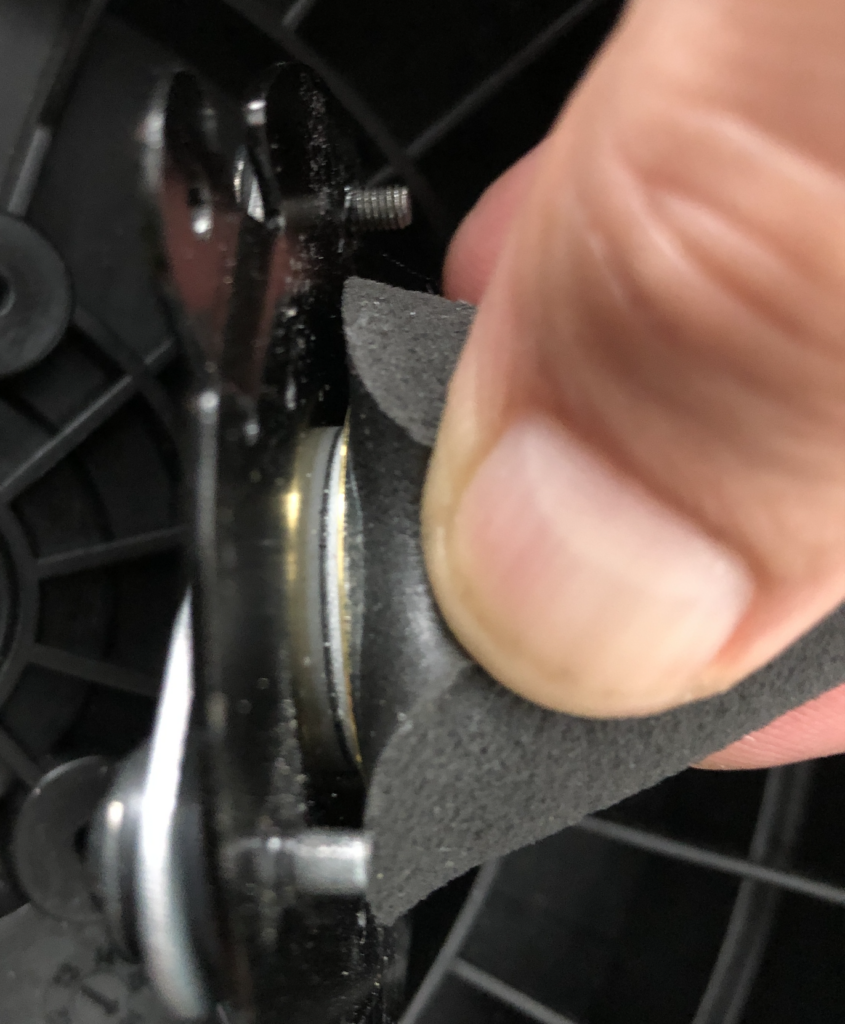
The piezo sits under the cone
You occasionally need to replace those cones, they come with the adhesive on them and are simply stuck on the piezo. We will explore the proper mounting methods on in our Piezo articles. But basically, when you hit the head, the piezo flexes slightly and causes it to produce a signal that the drum module interprets as a hit. The signal strength is directly proportional to the force of the hit, which is translated to velocity levels by the drum modules.
A discussion about these would not be complete if we did not talk about the outliers. Yamaha has it's own take on Edrums, and their equipment is really different. They often multiplex (put more than one information on a single wire) signals in there, and with their pads, they actually use a different system. The head is still a piezo, but the other zones (the snare I am showing here has 3 zones and an encoder) use a completely different way of sending the information. We will actually dive into Yamaha and how a DIY drummer can tap into their ecosystem in a subsequent article.
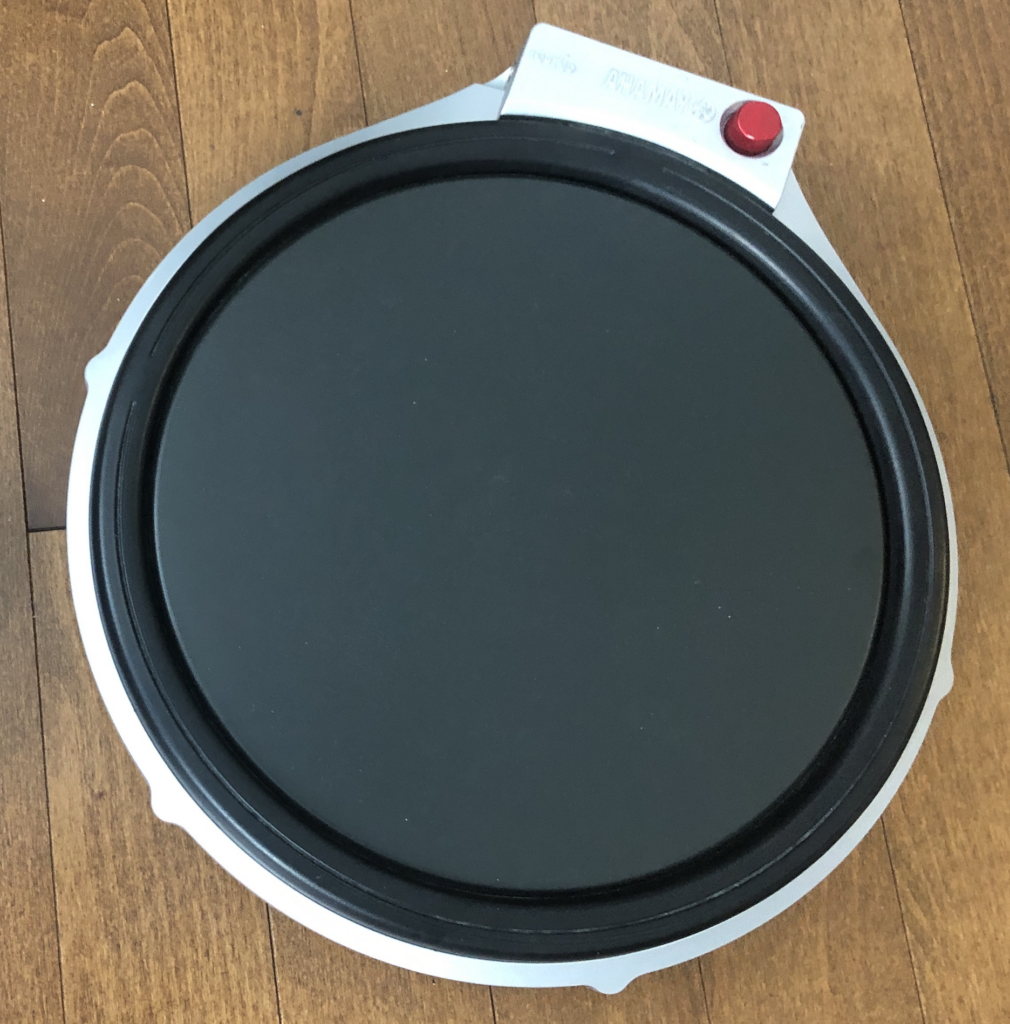
This is the elephant in the room
Those pads are completely different. They won't play well with other drum modules. They use a completely different system.
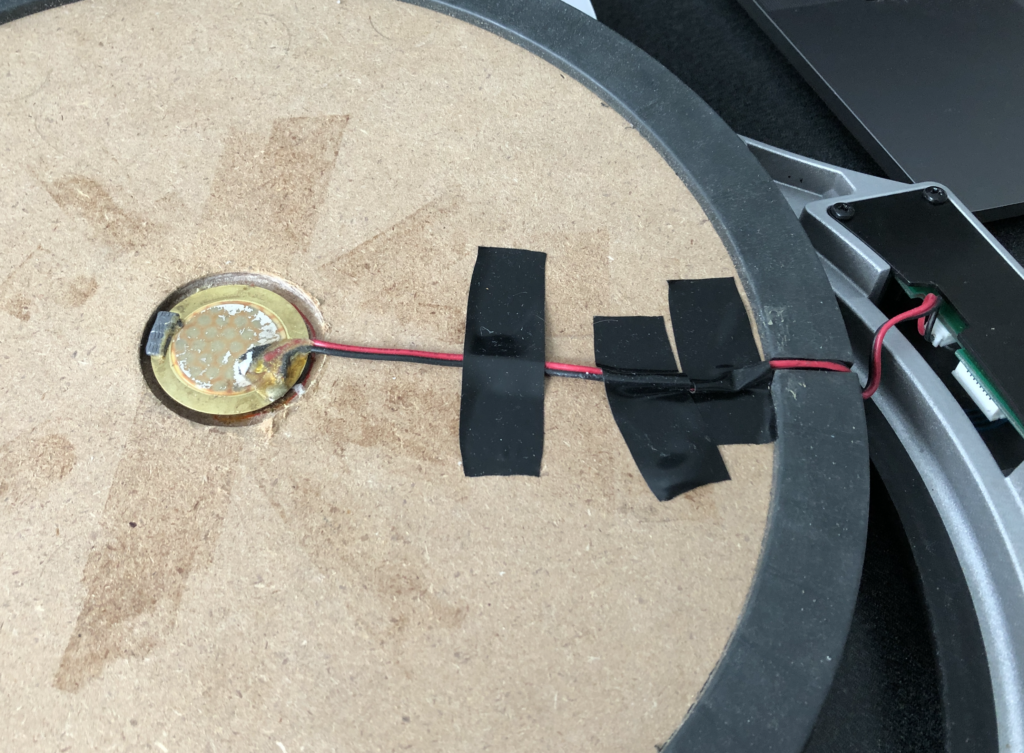
They still use peizos
They mount their piezos in a slightly different way, which we will talk about in the Piezo article. Now this part of the drum pad is not much different than the previous rubber pad we looked at. Note that instead of a metal disk, this one uses particle board.
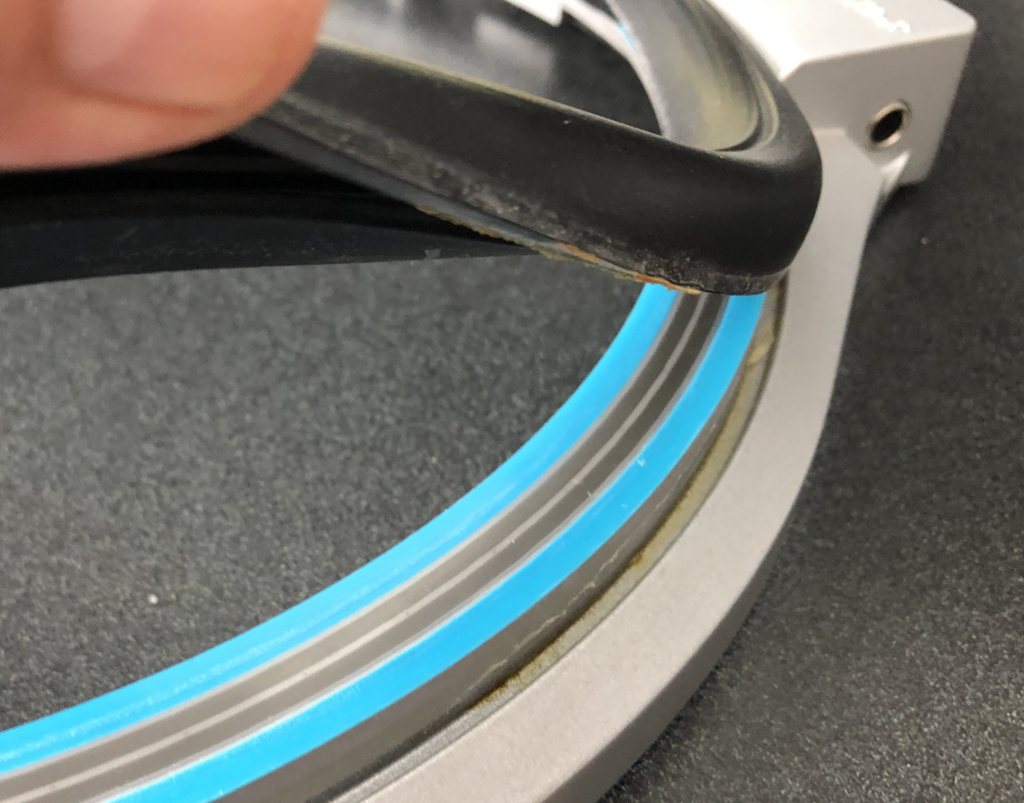
This is where the similarities end
Liftiing the rim of the pad, we discover a pressure sensitive membrane switch. Those switches make contact when pressed. The rubber rim when hit will cause the switch to momentarily close, thus creating a signal that can be interpreted by the drum module as a rim hit. The velocity of the hit is derived from the piezo that will still produce a signal when the rim is hit. This has the advantage of not having any crosstalk between the head and rim peizos. It also makes it simple to overlay other signals on the same wire...
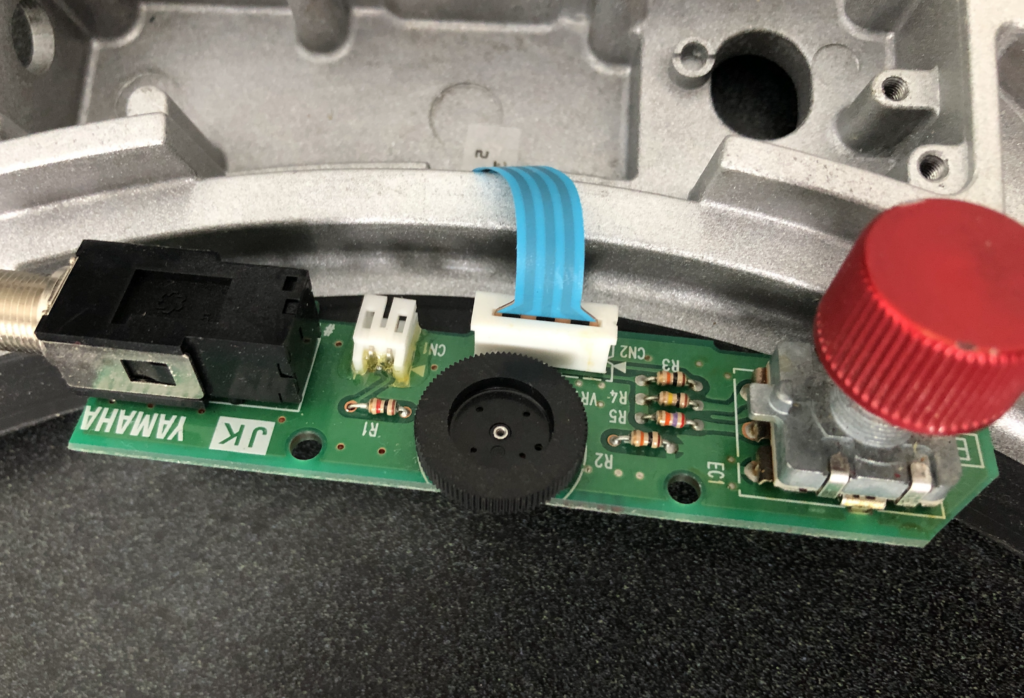
The circuit board is much busier
As we can see here, the circuit board is much busier. Sensitivity adjustment as well as a rotary encoder is used to provide some on pad control signal to the drum module, letting you control some of the pad's parameters. This is a nice feature, but complicates things for the DIY digital drummer. Not easy to make a snare for a Yamaha module. Thankfully you can always use the DT-50S setting supported on more recent Yamaha modules.

The DT-50S
This is a clip on trigger that uses piezos for both head and rim, These are basically the same as the internal triggers, but inverted. A piezo below the foam tower touches the head, the rim piezo is attached to the casing. Again, quite simple. You will find many different makes of those triggers, but they are basically all similar. They work sort of ok, playability is not great with mesh heads. They are mostly used on acoustic drums to layer electronic sounds over them.
Sory for the long article, but I hope it provides a good introduction to the subject for those starting out in the DIY Edrummer field. In part 2 of this article, we will cover cymbals. They work pretty much the same except for their use of membrane pressure switches, much like the Yamaha pads.